Backup/Restore P12 on Windows
It is of vital importance to keep a cold backup of your P12 file. The term cold simply refers to storing your P12 file offline, thereby protecting your data from unauthorized access and vulnerabilities. Cold storage may include but are not limited to encrypted hardware wallets or USB keys.
Backing up your P12
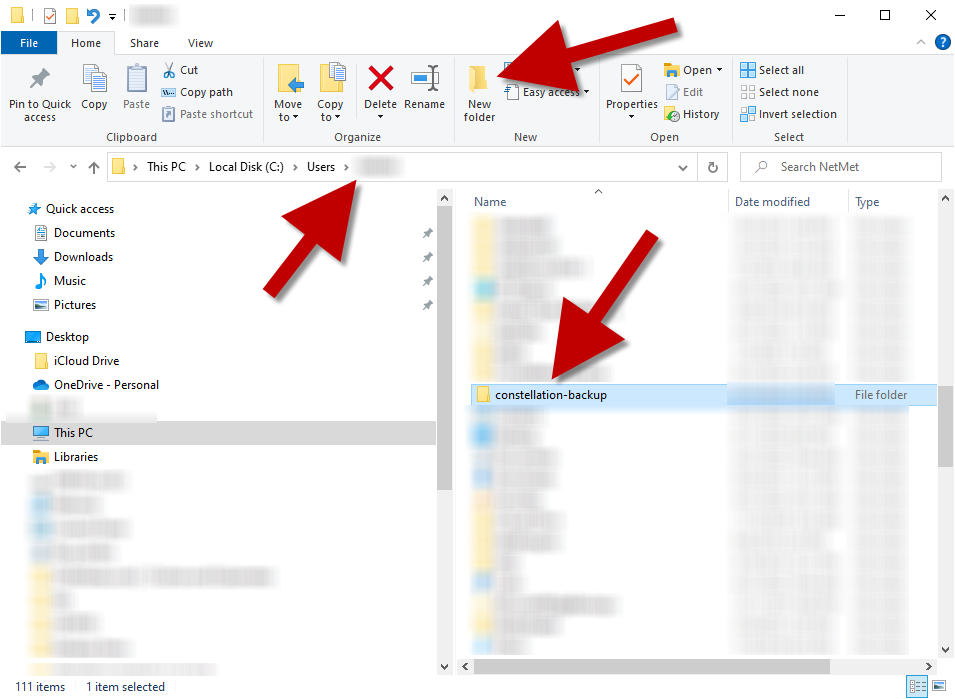
Log into your local system and open an Explorer session.
Create directory
Create a temporary directory to store the p12 file that you will backup from your node.
In this example 👇 we created a folder called constellation-backup off the root of the user's home directory. You can place your backup directory anywhere that is most comfortable to your preferences.
Open WinSCP
IMPORTANT
This documentation uses the WinSCP file transfer utility. You may use whatever program that is most comfortable to your preferences, and adapt this documentation to fit your program's needs. You can find WinSCP with a google search from your browser, and installation with the default setup is acceptable.
NOTE: During the WinSCP installation, when asked what window mode you would like, this documentation assumes you chose the commander style.
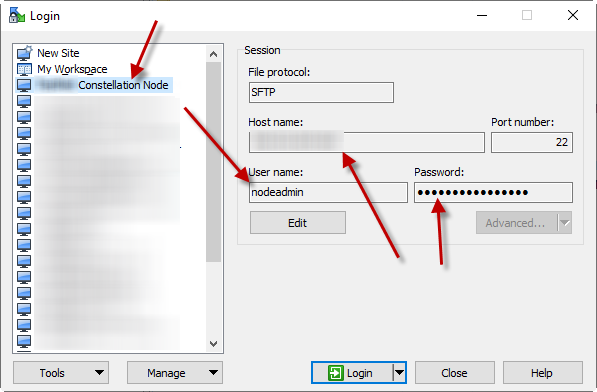
Configure connection
Open up WinSCP. In the Login window, choose New Site and fill in the details of how to access your node.
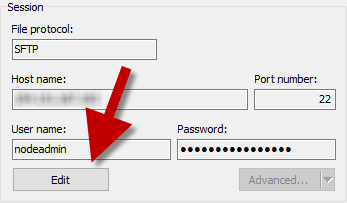
Click on the Edit button.
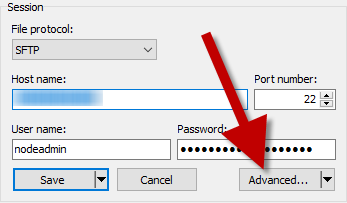
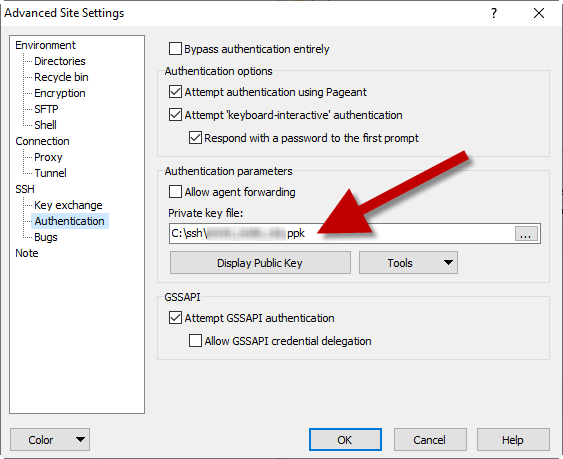
Click on the Advanced button.
Select Authentication from the left side panel and then browse to the SSH key File that you use to connect to your node.
Connect to node
Select OK and Save and then connect to your node. You should be prompted for your passphrase upon login.
You may also be prompted with a security warning about your SSH key being unknown or new. Since we know that our ssh key is coming from us and is known, we can approve this.
Once you are logged in, you can navigate on the left panel to your backup directory
Navigate to your /home/nodeadmin/tessellation directory on the right panel.
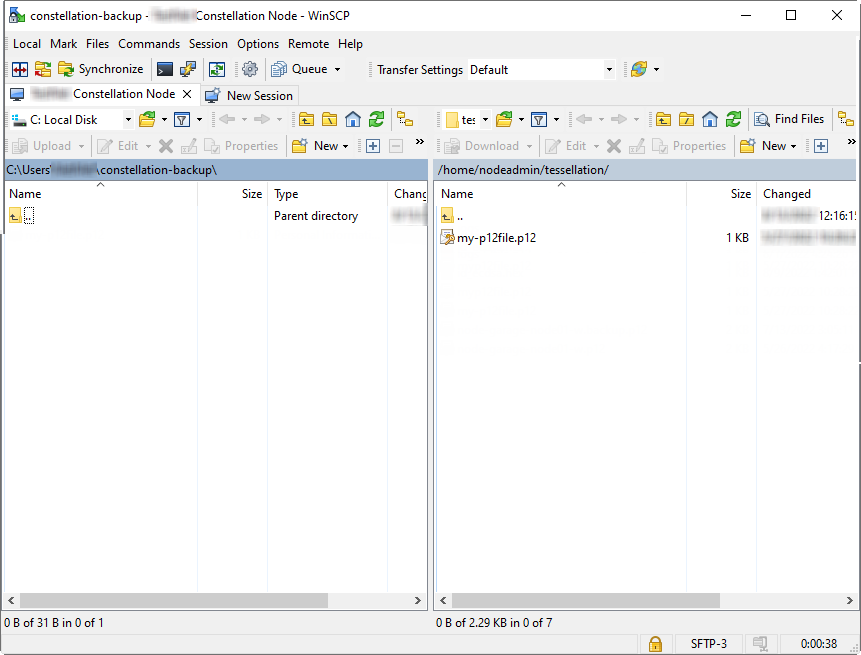
Download P12 file
Drag the p12 file from the right panel to the left panel.
You have successfully downloaded your p12 file.
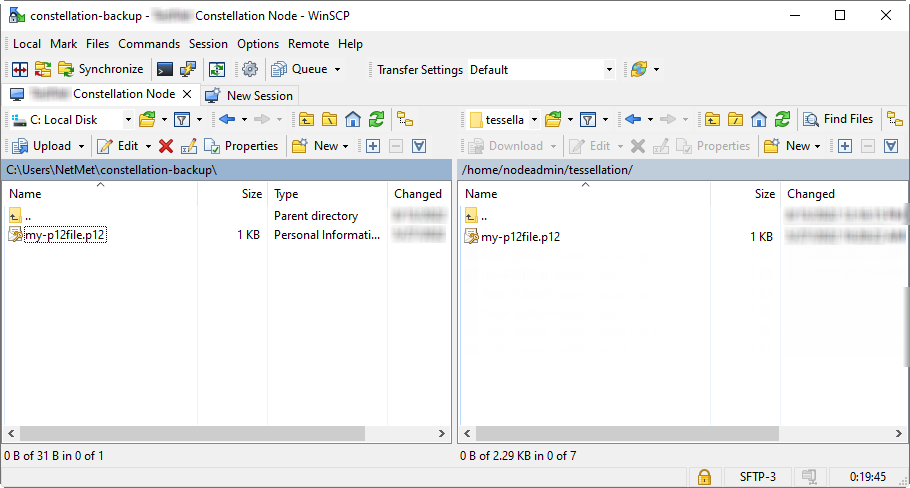
Transfer to cold storage
- Transfer your newly downloaded p12 file to your cold storage device.
- Remember to remove the p12 file and temp backup directory when you are done.
Restoring your P12
Install Tessellation
If you are restoring your p12 file to node that has been installed using nodectl (recommended):
- Make sure you do the installation of
Tessellationfirst usingnodectlbefore you restore your p12 key file. - During the installation you will need to use the same p12 file name as you did previously in order to make sure that the configuration
nodectlbuilds matches.
Migrate P12 file
To restore your p12 key file, copy your backup from cold storage to your Windows system backup directory. Create the directory if not present.
IMPORTANT
If you followed the directions to restore a new or existing node, you should have used nodectl to install Tessellation properly using the same P12 filename. The directory listing will show your p12 file with the same name that you are attempting to restore.
Follow the instructions from the backup section above. However, instead of dragging the file from the right side to the left side, you will reverse this process and drag from the left to the right. If you are requested to confirm replacement, select yes.
Congratulations, you have successfully restored your P12 key file.