Allocate EIP to EC2
EIP Control Panel
The EC2 Instance (future Constellation Network node) will need to be stopped and started. With the current configuration, AWS will disassociate or external IP automatically, and assign us a new one, on every restart. We do not want our IP Address to change.
Since our local computer accessing this EC2 instance will be configured with a static configuration, it is more efficient to assign an EIP to our EC2 instance.
To accomplish this, we will setup an Elastic IP address (EIP) to persist our Internet presence.
note
The Constellation Network Hypergraph and subsequent metagraphs to not need persistent IP addresses. This step is to eliminate unnecessary steps to administer your node each time it is restarted.
EIP addresses on AWS to not incur cost unless not in use.
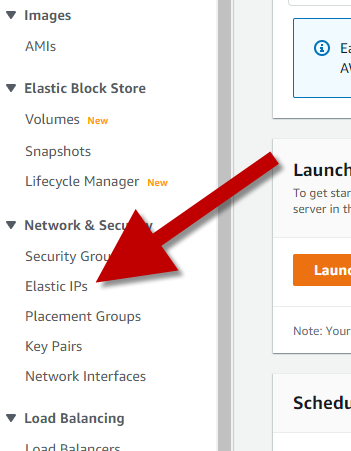
- Open up the Elastic IPs control panel.
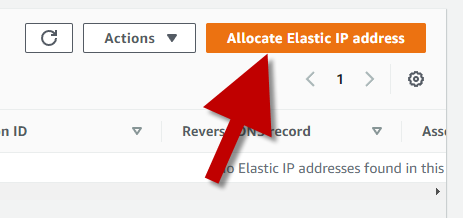
- Select the
Allocate Elastic IP Addressbutton.
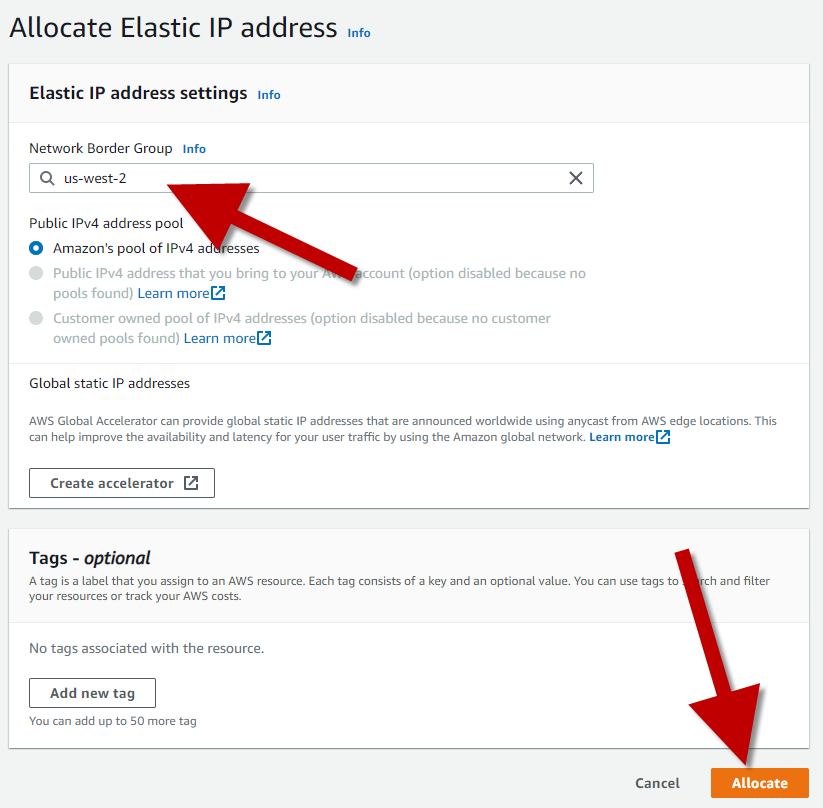
- Make sure we have selected the same Region as our instance was created in and click on
Allocate Elastic IP address.
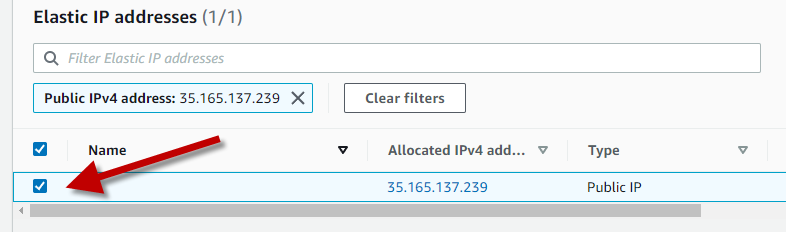
AWS will now assign (allocate) an eIP for us to use. Let's verify that our eIP is assigned to us.
- Select the
Elastic IP address.
Important
You will not be charged for an eIP that is in use; However, you will be charged for an allocated eIP that is not in use.
From the top right choose the Actions dropdown, and select Associate Elastic IP address . In the above section we selected the eIP.
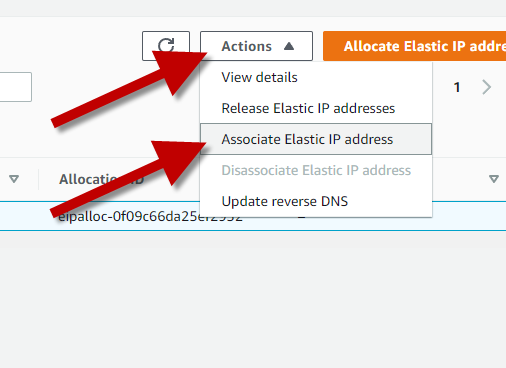
We want to associate to our instance.
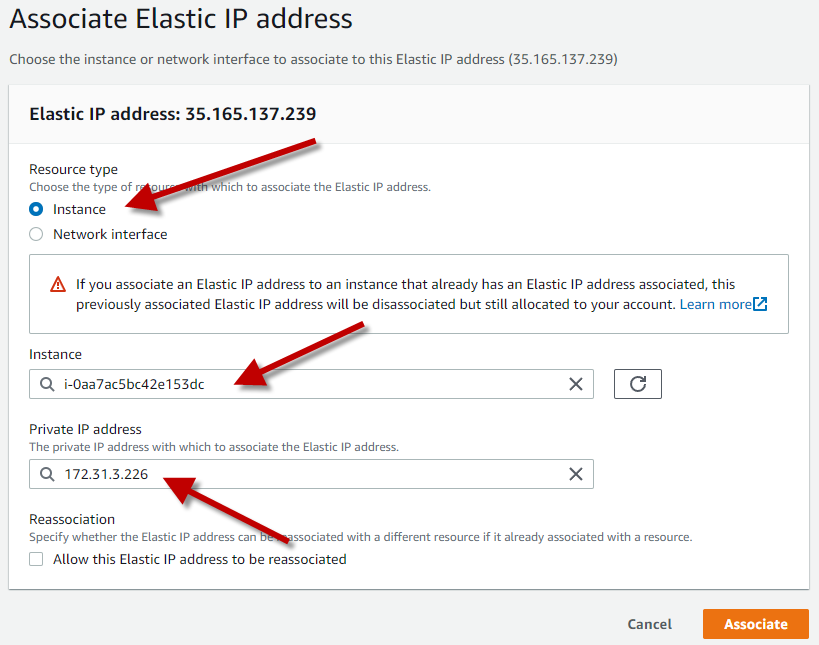
- Choose
Instance - Search for our created Instance
- Our Private IP Address will auto populate (no need to change anything here)
- Finally we can click the
Associatebutton.
We are ready to setup our security groups (firewall settings).